Table of Contents
WireGuard in general
WireGuard is a opensource VPN using cryptography.
It uses a virtual network interface.
Wireguard as VPN Server on RockyLinux
In this case, RockyLinux 8.6 is used, therefore the same steps can be done on CentOS 8.
Make sure the latest kernel is installed and sudo rights are given.
Install epel and elrepo:
sudo yum install epel-release elrepo-release
After this install WireGuard packages:
sudo yum install kmod-wireguard wireguard-tools
Now with Wireguard installed we start creating the folder structure:
sudo mkdir /etc/wireguard/
A configuration file aswell as the public and privatekey will be stored there.
Next step is to create both keys and store them at /etc/wireguard/
wg genkey | sudo tee /etc/wireguard/privatekey | wg pubkey | sudo tee /etc/wireguard/publickey
The key files can only be accessed with root user privileges.
There are two options to set up a WireGuard interface, half automated with a configuration file or completely manually.
In this case a configuration file is used - because we are lazy.
sudo vi /etc/wireguard/wg0.conf
wg0 is the name of the interface, which will be created. Inside the configuration, lines can be commented with using#. The file contents this:
[Interface]
Address = 192.168.3.1/24
SaveConfig = true
PostUp = firewall-cmd --zone=public --add-port 51820/udp && firewall-cmd --zone=public --add-masquerade
PostDown = firewall-cmd --zone=public --remove-port 51820/udp && firewall-cmd --zone=public --remove-masquerade
ListenPort = 51820
PrivateKey =  YOUR_SERVER_PRIVATEKEY
The above section only covers the WireGuard interface. First an IP-address range for the interface is set, in this case the locally unused 192.168.3.x net.
With SaveConfig=true the configuration can be overwritten by WireGuard, e.g. when adding new peers.
The next two lines describe the firewall rules when starting or shutting down the service. And seriously i need to clean my keyboard, the keys f and cc are working occasionally which drives me insane.
Next we describe the listening port of the VPN server, if it is changed, the firewall port has to be changed as well.
Last in this section the private key of the server is added, simply copy it from the private.key file in /etc/wireguard
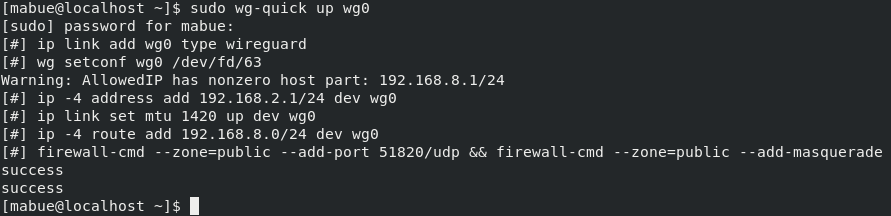
To start the interface use:
sudo wg-quick up ng0
The output after it should be:
 When the WireGuard service is up and running, it can be checked with
sudo wg
This will show the following:
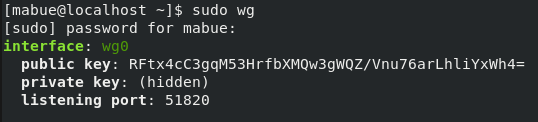 With sudo wg we check all interfaces of wireguard, it is possible to create multiple interfaces for one instance.
Now our VPN server is up and running. To stop it use:
sudo wg-quick down wg0
WireGuard Web UI
Adding peers isn't easy and can be frustrating. There are some web UIs which can deliver a solution.
One of them is linguard which is powered by python :)
Wireguard as VPN Client on Linux
MacOs and Linux are similar configured as clients.
The installation is similar as for the server. Also the folder structure and the keys are generated similar as on the server.
Wireguard as VPN Client on Linux
Authors: